Certificate Services
Gardener extension controller for certificate services for shoot clusters


Project Gardener implements the automated management and operation of Kubernetes clusters as a service. Its main principle is to leverage Kubernetes concepts for all of its tasks.
Recently, most of the vendor specific logic has been developed in-tree. However, the project has grown to a size where it is very hard to extend, maintain, and test. With GEP-1 we have proposed how the architecture can be changed in a way to support external controllers that contain their very own vendor specifics. This way, we can keep Gardener core clean and independent.
Configuration
Example configuration for this extension controller:
apiVersion: shoot-cert-service.extensions.config.gardener.cloud/v1alpha1
kind: Configuration
issuerName: gardener
restrictIssuer: true # restrict issuer to any sub-domain of shoot.spec.dns.domain (default)
acme:
  email: john.doe@example.com
  server: https://acme-v02.api.letsencrypt.org/directory
# privateKey: | # Optional key for Let's Encrypt account.
#   -----BEGIN BEGIN RSA PRIVATE KEY-----
#   ...
#   -----END RSA PRIVATE KEY-----
Extension-Resources
Example extension resource:
apiVersion: extensions.gardener.cloud/v1alpha1
kind: Extension
metadata:
  name: "extension-certificate-service"
  namespace: shoot--project--abc
spec:
  type: shoot-cert-service
When an extension resource is reconciled, the extension controller will create an instance of Cert-Management as well as an Issuer with the ACME information provided in the configuration above. These resources are placed inside the shoot namespace on the seed. Also, the controller takes care about generating necessary RBAC resources for the seed as well as for the shoot.
Please note, this extension controller relies on the Gardener-Resource-Manager to deploy k8s resources to seed and shoot clusters, i.e. it never deploys them directly.
How to start using or developing this extension controller locally
You can run the controller locally on your machine by executing make start. Please make sure to have the kubeconfig to the cluster you want to connect to ready in the ./dev/kubeconfig file.
Static code checks and tests can be executed by running make verify. We are using Go modules for Golang package dependency management and Ginkgo/Gomega for testing.
Feedback and Support
Feedback and contributions are always welcome!
Please report bugs or suggestions as GitHub issues or reach out on Slack (join the workspace here).
Learn more!
Please find further resources about out project here:
1 - Changing alerting settings
How to change the alerting on expiring certificates
Changing alerting settings
Certificates are normally renewed automatically 30 days before they expire.
As a second line of defense, there is an alerting in Prometheus activated if the certificate is a few days
before expiration. By default, the alert is triggered 15 days before expiration.
You can configure the days in the providerConfig of the extension.
Setting it to 0 disables the alerting.
In this example, the days are changed to 3 days before expiration.
kind: Shoot
...
spec:
  extensions:
  - type: shoot-cert-service
    providerConfig:
      apiVersion: service.cert.extensions.gardener.cloud/v1alpha1
      kind: CertConfig
      alerting:
        certExpirationAlertDays: 3
2 - Manage certificates with Gardener for default domain
Use the Gardener cert-management to get fully managed, publicly trusted TLS certificates
Manage certificates with Gardener for default domain
Introduction
Dealing with applications on Kubernetes which offer a secure service endpoints (e.g. HTTPS) also require you to enable a
secured communication via SSL/TLS. With the certificate extension enabled, Gardener can manage commonly trusted X.509 certificate for your application
endpoint. From initially requesting certificate, it also handeles their renewal in time using the free Let’s Encrypt API.
There are two senarios with which you can use the certificate extension
- You want to use a certificate for a subdomain the shoot’s default DNS (see
.spec.dns.domain of your shoot resource, e.g. short.ingress.shoot.project.default-domain.gardener.cloud). If this is your case, please keep reading this article. - You want to use a certificate for a custom domain. If this is your case, please see Manage certificates with Gardener for public domain
Prerequisites
Before you start this guide there are a few requirements you need to fulfill:
- You have an existing shoot cluster
Since you are using the default DNS name, all DNS configuration should already be done and ready.
Issue a certificate
Every X.509 certificate is represented by a Kubernetes custom resource certificate.cert.gardener.cloud in your cluster. A Certificate resource may be used to initiate a new certificate request as well as to manage its lifecycle. Gardener’s certificate service regularly checks the expiration timestamp of Certificates, triggers a renewal process if necessary and replaces the existing X.509 certificate with a new one.
Your application should be able to reload replaced certificates in a timely manner to avoid service disruptions.
Certificates can be requested via 3 resources type
- Ingress
- Service (type LoadBalancer)
- certificate (Gardener CRD)
If either of the first 2 are used, a corresponding Certificate resource will automatically be created.
Using an ingress Resource
apiVersion: networking.k8s.io/v1
kind: Ingress
metadata:
  name: amazing-ingress
  annotations:
    cert.gardener.cloud/purpose: managed
    #cert.gardener.cloud/issuer: custom-issuer                    # optional to specify custom issuer (use namespace/name for shoot issuers)
    #cert.gardener.cloud/follow-cname: "true"                     # optional, same as spec.followCNAME in certificates
    #cert.gardener.cloud/secret-labels: "key1=value1,key2=value2" # optional labels for the certificate secret
    #cert.gardener.cloud/preferred-chain: "chain name"            # optional to specify preferred-chain (value is the Subject Common Name of the root issuer)
    #cert.gardener.cloud/private-key-algorithm: ECDSA             # optional to specify algorithm for private key, allowed values are 'RSA' or 'ECDSA'
    #cert.gardener.cloud/private-key-size: "384"                  # optional to specify size of private key, allowed values for RSA are "2048", "3072", "4096" and for ECDSA "256" and "384"spec:
  tls:
  - hosts:
    # Must not exceed 64 characters.
    - short.ingress.shoot.project.default-domain.gardener.cloud
    # Certificate and private key reside in this secret.
    secretName: tls-secret
  rules:
  - host: short.ingress.shoot.project.default-domain.gardener.cloud
    http:
      paths:
      - pathType: Prefix
        path: "/"
        backend:
          service:
            name: amazing-svc
            port:
              number: 8080
Using a service type LoadBalancer
apiVersion: v1
kind: Service
metadata:
  annotations:
    cert.gardener.cloud/purpose: managed
    # Certificate and private key reside in this secret.
    cert.gardener.cloud/secretname: tls-secret
    # You may add more domains separated by commas (e.g. "service.shoot.project.default-domain.gardener.cloud, amazing.shoot.project.default-domain.gardener.cloud")
    dns.gardener.cloud/dnsnames: "service.shoot.project.default-domain.gardener.cloud"
    dns.gardener.cloud/ttl: "600"
    #cert.gardener.cloud/issuer: custom-issuer                    # optional to specify custom issuer (use namespace/name for shoot issuers)
    #cert.gardener.cloud/follow-cname: "true"                     # optional, same as spec.followCNAME in certificates
    #cert.gardener.cloud/secret-labels: "key1=value1,key2=value2" # optional labels for the certificate secret
    #cert.gardener.cloud/preferred-chain: "chain name"            # optional to specify preferred-chain (value is the Subject Common Name of the root issuer)
    #cert.gardener.cloud/private-key-algorithm: ECDSA             # optional to specify algorithm for private key, allowed values are 'RSA' or 'ECDSA'
    #cert.gardener.cloud/private-key-size: "384"                  # optional to specify size of private key, allowed values for RSA are "2048", "3072", "4096" and for ECDSA "256" and "384"  name: test-service
  namespace: default
spec:
  ports:
    - name: http
      port: 80
      protocol: TCP
      targetPort: 8080
  type: LoadBalancer
Using the custom Certificate resource
apiVersion: cert.gardener.cloud/v1alpha1
kind: Certificate
metadata:
  name: cert-example
  namespace: default
spec:
  commonName: short.ingress.shoot.project.default-domain.gardener.cloud
  secretRef:
    name: tls-secret
    namespace: default
  # Optionnal if using the default issuer
  issuerRef:
    name: garden
If you’re interested in the current progress of your request, you’re advised to consult the description, more specifically the status attribute in case the issuance failed.
Request a wildcard certificate
In order to avoid the creation of multiples certificates for every single endpoints, you may want to create a wildcard certificate for your shoot’s default cluster.
apiVersion: networking.k8s.io/v1
kind: Ingress
metadata:
  name: amazing-ingress
  annotations:
    cert.gardener.cloud/purpose: managed
    cert.gardener.cloud/commonName: "*.ingress.shoot.project.default-domain.gardener.cloud"
spec:
  tls:
  - hosts:
    - amazing.ingress.shoot.project.default-domain.gardener.cloud
    secretName: tls-secret
  rules:
  - host: amazing.ingress.shoot.project.default-domain.gardener.cloud
    http:
      paths:
      - pathType: Prefix
        path: "/"
        backend:
          service:
            name: amazing-svc
            port:
              number: 8080
Please note that this can also be achived by directly adding an annotation to a Service type LoadBalancer. You could also create a Certificate object with a wildcard domain.
For more information and more examples about using the certificate extension, please see Manage certificates with Gardener for public domain
3 - Manage certificates with Gardener for public domain
Use the Gardener cert-management to get fully managed, publicly trusted TLS certificates
Manage certificates with Gardener for public domain
Introduction
Dealing with applications on Kubernetes which offer a secure service endpoints (e.g. HTTPS) also require you to enable a
secured communication via SSL/TLS. With the certificate extension enabled, Gardener can manage commonly trusted X.509 certificate for your application
endpoint. From initially requesting certificate, it also handeles their renewal in time using the free Let’s Encrypt API.
There are two senarios with which you can use the certificate extension
- You want to use a certificate for a subdomain the shoot’s default DNS (see
.spec.dns.domain of your shoot resource, e.g. short.ingress.shoot.project.default-domain.gardener.cloud). If this is your case, please see Manage certificates with Gardener for default domain - You want to use a certificate for a custom domain. If this is your case, please keep reading this article.
Prerequisites
Before you start this guide there are a few requirements you need to fulfill:
- You have an existing shoot cluster
- Your custom domain is under a public top level domain (e.g.
.com) - Your custom zone is resolvable with a public resolver via the internet (e.g.
8.8.8.8) - You have a custom DNS provider configured and working (see “DNS Providers”)
As part of the Let’s Encrypt ACME challenge validation process, Gardener sets a DNS TXT entry and Let’s Encrypt checks if it can both resolve and authenticate it. Therefore, it’s important that your DNS-entries are publicly resolvable. You can check this by querying e.g. Googles public DNS server and if it returns an entry your DNS is publicly visible:
# returns the A record for cert-example.example.com using Googles DNS server (8.8.8.8)
dig cert-example.example.com @8.8.8.8 A
DNS provider
In order to issue certificates for a custom domain you need to specify a DNS provider which is permitted to create DNS records for subdomains of your requested domain in the certificate. For example, if you request a certificate for host.example.com your DNS provider must be capable of managing subdomains of host.example.com.
DNS providers are normally specified in the shoot manifest. To learn more on how to configure one, please see the DNS provider documentation.
Issue a certificate
Every X.509 certificate is represented by a Kubernetes custom resource certificate.cert.gardener.cloud in your cluster. A Certificate resource may be used to initiate a new certificate request as well as to manage its lifecycle. Gardener’s certificate service regularly checks the expiration timestamp of Certificates, triggers a renewal process if necessary and replaces the existing X.509 certificate with a new one.
Your application should be able to reload replaced certificates in a timely manner to avoid service disruptions.
Certificates can be requested via 3 resources type
- Ingress
- Service (type LoadBalancer)
- Gateways (both Istio gateways and from the Gateway API)
- Certificate (Gardener CRD)
If either of the first 2 are used, a corresponding Certificate resource will be created automatically.
Using an Ingress Resource
apiVersion: networking.k8s.io/v1
kind: Ingress
metadata:
  name: amazing-ingress
  annotations:
    cert.gardener.cloud/purpose: managed
    # Optional but recommended, this is going to create the DNS entry at the same time
    dns.gardener.cloud/class: garden
    dns.gardener.cloud/ttl: "600"
    #cert.gardener.cloud/commonname: "*.example.com"              # optional, if not specified the first name from spec.tls[].hosts is used as common name
    #cert.gardener.cloud/dnsnames: ""                             # optional, if not specified the names from spec.tls[].hosts are used
    #cert.gardener.cloud/follow-cname: "true"                     # optional, same as spec.followCNAME in certificates
    #cert.gardener.cloud/secret-labels: "key1=value1,key2=value2" # optional labels for the certificate secret
    #cert.gardener.cloud/issuer: custom-issuer                    # optional to specify custom issuer (use namespace/name for shoot issuers)
    #cert.gardener.cloud/preferred-chain: "chain name"            # optional to specify preferred-chain (value is the Subject Common Name of the root issuer)
    #cert.gardener.cloud/private-key-algorithm: ECDSA             # optional to specify algorithm for private key, allowed values are 'RSA' or 'ECDSA'
    #cert.gardener.cloud/private-key-size: "384"                  # optional to specify size of private key, allowed values for RSA are "2048", "3072", "4096" and for ECDSA "256" and "384"

spec:
  tls:
  - hosts:
    # Must not exceed 64 characters.
    - amazing.example.com
    # Certificate and private key reside in this secret.
    secretName: tls-secret
  rules:
  - host: amazing.example.com
    http:
      paths:
      - pathType: Prefix
        path: "/"
        backend:
          service:
            name: amazing-svc
            port:
              number: 8080
Replace the hosts and rules[].host value again with your own domain and adjust the remaining Ingress attributes in accordance with your deployment (e.g. the above is for an istio Ingress controller and forwards traffic to a service1 on port 80).
Using a Service of type LoadBalancer
apiVersion: v1
kind: Service
metadata:
  annotations:
    cert.gardener.cloud/secretname: tls-secret
    dns.gardener.cloud/dnsnames: example.example.com
    dns.gardener.cloud/class: garden
    # Optional
    dns.gardener.cloud/ttl: "600"
    cert.gardener.cloud/commonname: "*.example.example.com"
    cert.gardener.cloud/dnsnames: ""
    #cert.gardener.cloud/follow-cname: "true"                     # optional, same as spec.followCNAME in certificates
    #cert.gardener.cloud/secret-labels: "key1=value1,key2=value2" # optional labels for the certificate secret
    #cert.gardener.cloud/issuer: custom-issuer                    # optional to specify custom issuer (use namespace/name for shoot issuers)
    #cert.gardener.cloud/preferred-chain: "chain name"            # optional to specify preferred-chain (value is the Subject Common Name of the root issuer)
    #cert.gardener.cloud/private-key-algorithm: ECDSA             # optional to specify algorithm for private key, allowed values are 'RSA' or 'ECDSA'
    #cert.gardener.cloud/private-key-size: "384"                  # optional to specify size of private key, allowed values for RSA are "2048", "3072", "4096" and for ECDSA "256" and "384"

  name: test-service
  namespace: default
spec:
  ports:
    - name: http
      port: 80
      protocol: TCP
      targetPort: 8080
  type: LoadBalancer
Using a Gateway resource
Please see Istio Gateways or Gateway API for details.
Using the custom Certificate resource
apiVersion: cert.gardener.cloud/v1alpha1
kind: Certificate
metadata:
  name: cert-example
  namespace: default
spec:
  commonName: amazing.example.com
  secretRef:
    name: tls-secret
    namespace: default
  # Optionnal if using the default issuer
  issuerRef:
    name: garden

  # If delegated domain for DNS01 challenge should be used. This has only an effect if a CNAME record is set for
  # '_acme-challenge.amazing.example.com'.
  # For example: If a CNAME record exists '_acme-challenge.amazing.example.com' => '_acme-challenge.writable.domain.com',
  # the DNS challenge will be written to '_acme-challenge.writable.domain.com'.
  #followCNAME: true

  # optionally set labels for the secret
  #secretLabels:
  #  key1: value1
  #  key2: value2

  # Optionally specify the preferred certificate chain: if the CA offers multiple certificate chains, prefer the chain with an issuer matching this Subject Common Name. If no match, the default offered chain will be used.
  #preferredChain: "ISRG Root X1"

  # Optionally specify algorithm and key size for private key. Allowed algorithms: "RSA" (allowed sizes: 2048, 3072, 4096) and "ECDSA" (allowed sizes: 256, 384)
  # If not specified, RSA with 2048 is used.
  #privateKey:
  #  algorithm: ECDSA
  #  size: 384
Supported attributes
Here is a list of all supported annotations regarding the certificate extension:
| Path | Annotation | Value | Required | Description |
|---|
| N/A | cert.gardener.cloud/purpose: | managed | Yes when using annotations | Flag for Gardener that this specific Ingress or Service requires a certificate |
spec.commonName | cert.gardener.cloud/commonname: | E.g. “*.demo.example.com” or
“special.example.com” | Certificate and Ingress : No
Service: Yes, if DNS names unset | Specifies for which domain the certificate request will be created. If not specified, the names from spec.tls[].hosts are used. This entry must comply with the 64 character limit. |
spec.dnsNames | cert.gardener.cloud/dnsnames: | E.g. “special.example.com” | Certificate and Ingress : No
Service: Yes, if common name unset | Additional domains the certificate should be valid for (Subject Alternative Name). If not specified, the names from spec.tls[].hosts are used. Entries in this list can be longer than 64 characters. |
spec.secretRef.name | cert.gardener.cloud/secretname: | any-name | Yes for certificate and Service | Specifies the secret which contains the certificate/key pair. If the secret is not available yet, it’ll be created automatically as soon as the certificate has been issued. |
spec.issuerRef.name | cert.gardener.cloud/issuer: | E.g. gardener | No | Specifies the issuer you want to use. Only necessary if you request certificates for custom domains. |
| N/A | cert.gardener.cloud/revoked: | true otherwise always false | No | Use only to revoke a certificate, see reference for more details |
spec.followCNAME | cert.gardener.cloud/follow-cname | E.g. true | No | Specifies that the usage of a delegated domain for DNS challenges is allowed. Details see Follow CNAME. |
spec.preferredChain | cert.gardener.cloud/preferred-chain | E.g. ISRG Root X1 | No | Specifies the Common Name of the issuer for selecting the certificate chain. Details see Preferred Chain. |
spec.secretLabels | cert.gardener.cloud/secret-labels | for annotation use e.g. key1=value1,key2=value2 | No | Specifies labels for the certificate secret. |
spec.privateKey.algorithm | cert.gardener.cloud/private-key-algorithm | RSA, ECDSA | No | Specifies algorithm for private key generation. The default value is depending on configuration of the extension (default of the default is RSA). You may request a new certificate without privateKey settings to find out the concrete defaults in your Gardener. |
spec.privateKey.size | cert.gardener.cloud/private-key-size | "256", "384", "2048", "3072", "4096" | No | Specifies size for private key generation. Allowed values for RSA are 2048, 3072, and 4096. For ECDSA allowed values are 256 and 384. The default values are depending on the configuration of the extension (defaults of the default values are 3072 for RSA and 384 for ECDSA respectively). |
Request a wildcard certificate
In order to avoid the creation of multiples certificates for every single endpoints, you may want to create a wildcard certificate for your shoot’s default cluster.
apiVersion: networking.k8s.io/v1
kind: Ingress
metadata:
  name: amazing-ingress
  annotations:
    cert.gardener.cloud/purpose: managed
    cert.gardener.cloud/commonName: "*.example.com"
spec:
  tls:
  - hosts:
    - amazing.example.com
    secretName: tls-secret
  rules:
  - host: amazing.example.com
    http:
      paths:
      - pathType: Prefix
        path: "/"
        backend:
          service:
            name: amazing-svc
            port:
              number: 8080
Please note that this can also be achived by directly adding an annotation to a Service type LoadBalancer. You could also create a Certificate object with a wildcard domain.
Using a custom Issuer
Most Gardener deployment with the certification extension enabled have a preconfigured garden issuer. It is also usually configured to use Let’s Encrypt as the certificate provider.
If you need a custom issuer for a specific cluster, please see Using a custom Issuer
Quotas
For security reasons there may be a default quota on the certificate requests per day set globally in the controller
registration of the shoot-cert-service.
The default quota only applies if there is no explicit quota defined for the issuer itself with the field
requestsPerDayQuota, e.g.:
kind: Shoot
...
spec:
  extensions:
  - type: shoot-cert-service
    providerConfig:
      apiVersion: service.cert.extensions.gardener.cloud/v1alpha1
      kind: CertConfig
      issuers:
        - email: your-email@example.com
          name: custom-issuer # issuer name must be specified in every custom issuer request, must not be "garden"
          server: 'https://acme-v02.api.letsencrypt.org/directory'
          requestsPerDayQuota: 10
DNS Propagation
As stated before, cert-manager uses the ACME challenge protocol to authenticate that you are the DNS owner for the domain’s certificate you are requesting.
This works by creating a DNS TXT record in your DNS provider under _acme-challenge.example.example.com containing a token to compare with. The TXT record is only applied during the domain validation.
Typically, the record is propagated within a few minutes. But if the record is not visible to the ACME server for any reasons, the certificate request is retried again after several minutes.
This means you may have to wait up to one hour after the propagation problem has been resolved before the certificate request is retried. Take a look in the events with kubectl describe ingress example for troubleshooting.
Character Restrictions
Due to restriction of the common name to 64 characters, you may to leave the common name unset in such cases.
For example, the following request is invalid:
apiVersion: cert.gardener.cloud/v1alpha1
kind: Certificate
metadata:
  name: cert-invalid
  namespace: default
spec:
  commonName: morethan64characters.ingress.shoot.project.default-domain.gardener.cloud
But it is valid to request a certificate for this domain if you have left the common name unset:
apiVersion: cert.gardener.cloud/v1alpha1
kind: Certificate
metadata:
  name: cert-example
  namespace: default
spec:
  dnsNames:
  - morethan64characters.ingress.shoot.project.default-domain.gardener.cloud
References
4 - Using a custom Issuer
How to define a custom issuer forma shoot cluster
Using a custom Issuer
Another possibility to request certificates for custom domains is a dedicated issuer.
Note: This is only needed if the default issuer provided by Gardener is restricted to shoot related domains or you are using domain names not visible to public DNS servers. Which means that your senario most likely doesn’t require your to add an issuer.
The custom issuers are specified normally in the shoot manifest. If the shootIssuers feature is enabled, it can alternatively be defined in the shoot cluster.
Custom issuer in the shoot manifest
kind: Shoot
...
spec:
  extensions:
  - type: shoot-cert-service
    providerConfig:
      apiVersion: service.cert.extensions.gardener.cloud/v1alpha1
      kind: CertConfig
      issuers:
        - email: your-email@example.com
          name: custom-issuer # issuer name must be specified in every custom issuer request, must not be "garden"
          server: 'https://acme-v02.api.letsencrypt.org/directory'
          privateKeySecretName: my-privatekey # referenced resource, the private key must be stored in the secret at `data.privateKey` (optionally, only needed as alternative to auto registration)
          #precheckNameservers: # to provide special set of nameservers to be used for prechecking DNSChallenges for an issuer
          #- dns1.private.company-net:53
          #- dns2.private.company-net:53"
      #shootIssuers:
        # if true, allows to specify issuers in the shoot cluster
        #enabled: true
  resources:
  - name: my-privatekey
    resourceRef:
      apiVersion: v1
      kind: Secret
      name: custom-issuer-privatekey # name of secret in Gardener project
If you are using an ACME provider for private domains, you may need to change the nameservers used for
checking the availability of the DNS challenge’s TXT record before the certificate is requested from the ACME provider.
By default, only public DNS servers may be used for this purpose.
At least one of the precheckNameservers must be able to resolve the private domain names.
Using the custom issuer
To use the custom issuer in a certificate, just specify its name in the spec.
apiVersion: cert.gardener.cloud/v1alpha1
kind: Certificate
spec:
  ...
  issuerRef:
    name: custom-issuer
  ...
For source resources like Ingress or Service use the cert.gardener.cloud/issuer annotation.
apiVersion: networking.k8s.io/v1
kind: Ingress
metadata:
  name: amazing-ingress
  annotations:
    cert.gardener.cloud/purpose: managed
    cert.gardener.cloud/issuer: custom-issuer
...
Custom issuer in the shoot cluster
Prerequiste: The shootIssuers feature has to be enabled.
It is either enabled globally in the ControllerDeployment or in the shoot manifest
with:
kind: Shoot
...
spec:
  extensions:
  - type: shoot-cert-service
    providerConfig:
      apiVersion: service.cert.extensions.gardener.cloud/v1alpha1
      kind: CertConfig
      shootIssuers:
        enabled: true # if true, allows to specify issuers in the shoot cluster
...
Example for specifying an Issuer resource and its Secret directly in any
namespace of the shoot cluster:
apiVersion: cert.gardener.cloud/v1alpha1
kind: Issuer
metadata:
  name: my-own-issuer
  namespace: my-namespace
spec:
  acme:
    domains:
      include:
      - my.own.domain.com
    email: some.user@my.own.domain.com
    privateKeySecretRef:
      name: my-own-issuer-secret
      namespace: my-namespace
    server: https://acme-v02.api.letsencrypt.org/directory
---
apiVersion: v1
kind: Secret
metadata:
  name: my-own-issuer-secret
  namespace: my-namespace
type: Opaque
data:
  privateKey: ... # replace '...' with valus encoded as base64
Using the custom shoot issuer
To use the custom issuer in a certificate, just specify its name and namespace in the spec.
apiVersion: cert.gardener.cloud/v1alpha1
kind: Certificate
spec:
  ...
  issuerRef:
    name: my-own-issuer
    namespace: my-namespace
  ...
For source resources like Ingress or Service use the cert.gardener.cloud/issuer annotation.
apiVersion: networking.k8s.io/v1
kind: Ingress
metadata:
  name: amazing-ingress
  annotations:
    cert.gardener.cloud/purpose: managed
    cert.gardener.cloud/issuer: my-namespace/my-own-issuer
...
5 - Deployment
Gardener Certificate Management
Introduction
Gardener comes with an extension that enables shoot owners to request X.509 compliant certificates for shoot domains.
Extension Installation
The shoot-cert-service extension can be deployed and configured via Gardener’s native resource ControllerRegistration.
Prerequisites
To let the shoot-cert-service operate properly, you need to have:
Operator Extension
Using an operator extension resource (extension.operator.gardener.cloud) is the recommended way to deploy the shoot-cert-service extension.
An example of an operator extension resource can be found at extension-shoot-cert-service.yaml.
The ControllerRegistration contains a reference to the Helm chart which eventually deploy the shoot-cert-service to seed clusters.
It offers some configuration options, mainly to set up a default issuer for shoot clusters.
With a default issuer, pre-existing Let’s Encrypt accounts can be used and shared with shoot clusters (See Integration Guide - One Account or Many?).
Please keep the Let’s Encrypt Rate Limits in mind when using this shared account model. Depending on the amount of shoots and domains it is recommended to use an account with increased rate limits.
apiVersion: operator.gardener.cloud/v1alpha1
kind: Extension
metadata:
  annotations:
    security.gardener.cloud/pod-security-enforce: baseline
  name: extension-shoot-cert-service
spec:
  deployment:
    extension:
      helm:
        ociRepository:
          ref: ... # OCI reference to the Helm chart
      injectGardenKubeconfig: true
      policy: Always

      values:
        certificateConfig:
          defaultIssuer:
            name: default-issuer
            acme:
              email: some.user@example.com
              # optional private key for the Let's Encrypt account
              #privateKey: |-
              #-----BEGIN RSA PRIVATE KEY-----
              #...
              #-----END RSA PRIVATE KEY-----
              server: https://acme-v02.api.letsencrypt.org/directory
            # altenatively to `acme`, you can use a self-signed root or intermediate certificate for providing self-signed certificates
#           ca:
#             certificate: |
#               -----BEGIN CERTIFICATE-----
#               ...
#               -----END CERTIFICATE-----
#             certificateKey: |
#               -----BEGIN PRIVATE KEY-----
#               ...
#               -----END PRIVATE KEY-----

#          defaultRequestsPerDayQuota: 50

#          precheckNameservers: 8.8.8.8,8.8.4.4

#          caCertificates: | # optional custom CA certificates when using private ACME provider
#            -----BEGIN CERTIFICATE-----
#            ...
#            -----END CERTIFICATE-----
#            -----BEGIN CERTIFICATE-----
#            ...
#            -----END CERTIFICATE-----

        shootIssuers:
          enabled: false # if true, allows specifying issuers in the shoot clusters

        deactivateAuthorizations: true # if true, enables flag --acme-deactivate-authorizations in cert-controller-manager
        skipDNSChallengeValidation: false # if true, skips dns-challenges in cert-controller-manager

      # The following values are only needed if the extension should be deployed on the runtime cluster.
      runtimeClusterValues:
        certificateConfig:
          defaultIssuer:
            # typically the same values as at .spec.deployment.values.certificateConfig.defaultIssuer
            ...
  resources:
  - autoEnable:
    - shoot # if set, the extension is enabled for all shoots by default
    clusterCompatibility:
    - shoot
    kind: Extension
    type: shoot-cert-service
    workerlessSupported: true
  - clusterCompatibility:
    - garden
    - seed
    kind: Extension
    lifecycle:
      delete: AfterKubeAPIServer
      reconcile: BeforeKubeAPIServer
    type: controlplane-cert-service
Providing Trusted TLS Certificate for Garden Runtime Cluster
The shoot-cert-service can provide the TLS secret labeled with gardener.cloud/role: garden-cert in the garden namespace to be used by the Gardener API server.
See Trusted TLS Certificate for Garden Runtime Cluster for more information.
For this purpose, the extension must be deployed on the runtime cluster. Several configuration steps are needed:
- Provide the
spec.runtimeClusterValues values in the extension.operator.gardener.cloud resource in the operator extension. - Add the extension with type
controlplane-cert-service to the Garden resource on the Garden runtime cluster.apiVersion: operator.gardener.cloud/v1alpha1
kind: Garden
metadata:
name: ...
spec:
extensions:
- type: controlplane-cert-service
providerConfig:
apiVersion: service.cert.extensions.gardener.cloud/v1alpha1
kind: CertConfig
generateControlPlaneCertificate: true
If you only want to deploy the cert-controller-manager in the garden namespace, you can set generateControlPlaneCertificate to false.
If generateControlPlaneCertificate is set to true, the current values spec.virtualCluster.dns.domains and spec.runtimeCluster.ingress.domains from the Garden resource are read, and the certificate is created/updated in the garden namespace.
The certificate will be reconciled by the cert-controller-manager to provide the TLS secret with the label gardener.cloud/role: garden-cert in the garden namespace.
Additionally, the extension provides a webhook to mutate the virtual-garden-kube-apiserver deployment in the garden namespace.
It will manage the --tls-sni-cert-key command line arguments and patches the volume/volume mount with the TLS secret.
Only the secondary domain names will be used for the SNI certificate, as the self-signed certificate of the first domain name is provided by the Gardener operator.
Example for resulting domains of the certificate
If the Garden resource contains the following values:
apiVersion: operator.gardener.cloud/v1alpha1
kind: Garden
spec:
  runtimeCluster:
    ingress:
      domains:
      - name: "ingress.garden.example.com"
        provider: gardener-dns
  virtualCluster:
    dns:
      domains:
      - name: "primary.garden.example.com"
        provider: gardener-dns
      - name: "secondary.foo.example.com"
        provider: gardener-dns
then the Certificate will be created with these wildcard domain names:
*.primary.garden.example.com*.secondary.foo.example.com*.ingress.garden.example.com
Providing Trusted TLS Certificate for Shoot Control Planes
The shoot-cert-service can provide the TLS secret labeled with gardener.cloud/role: controlplane-cert in the garden namespace on the seeds.
See Trusted TLS Certificate for Shoot Control Planes for more information.
For this purpose, the extension must be enabled for the seed(s) by adding the controlplane-cert-service type to the Seed manifest:
apiVersion: core.gardener.cloud/v1beta1
kind: Seed
metadata:
  name: ...
spec:
  extensions:
  - type: controlplane-cert-service
    providerConfig:
      apiVersion: service.cert.extensions.gardener.cloud/v1alpha1
      kind: CertConfig
      generateControlPlaneCertificate: true
The certificate will contain the wildcard domain name using the base domain name from the .spec.ingress.domain value of the Seed resource.
ControllerRegistration
Using a ControllerRegistration / ControllerDeployment directly is not recommended if your Gardener landscape has a virtual Garden cluster.
In this case, please use an extension.operator.gardener.cloud resource as described above.
The Gardener operator will then take care of the ControllerRegistration and ControllerDeployment for you.
An example of a ControllerRegistration for the shoot-cert-service can be found at controller-registration.yaml.
The ControllerRegistration contains a Helm chart which eventually deploy the shoot-cert-service to seed clusters. It offers some configuration options, mainly to set up a default issuer for shoot clusters. With a default issuer, pre-existing Let’s Encrypt accounts can be used and shared with shoot clusters (See “One Account or Many?” of the Integration Guide).
Please keep the Let’s Encrypt Rate Limits in mind when using this shared account model. Depending on the amount of shoots and domains it is recommended to use an account with increased rate limits.
apiVersion: core.gardener.cloud/v1beta1
kind: ControllerRegistration
...
  values:
    certificateConfig:
      defaultIssuer:
        acme:
            email: foo@example.com
            privateKey: |-
              -----BEGIN RSA PRIVATE KEY-----
              ...
              -----END RSA PRIVATE KEY-----
            server: https://acme-v02.api.letsencrypt.org/directory
        name: default-issuer
#       restricted: true # restrict default issuer to any sub-domain of shoot.spec.dns.domain

#     defaultRequestsPerDayQuota: 50

#     precheckNameservers: 8.8.8.8,8.8.4.4

#     caCertificates: | # optional custom CA certificates when using private ACME provider
#     -----BEGIN CERTIFICATE-----
#     ...
#     -----END CERTIFICATE-----
#
#     -----BEGIN CERTIFICATE-----
#     ...
#     -----END CERTIFICATE-----

      shootIssuers:
        enabled: false # if true, allows to specify issuers in the shoot clusters
Enablement
If the shoot-cert-service should be enabled for every shoot cluster in your Gardener managed environment, you need to auto enable it in the ControllerRegistration:
apiVersion: core.gardener.cloud/v1beta1
kind: ControllerRegistration
...
  resources:
  - kind: Extension
    type: shoot-cert-service
    autoEnable:
    - shoot # if set, the extension is enabled for all shoots by default
    clusterCompatibility:
    - shoot
    workerlessSupported: true
Alternatively, you’re given the option to only enable the service for certain shoots:
kind: Shoot
apiVersion: core.gardener.cloud/v1beta1
...
spec:
  extensions:
  - type: shoot-cert-service
...
6 - Gardener yourself a Shoot with Istio, custom Domains, and Certificates
As we ramp up more and more friends of Gardener, I thought it worthwhile to explore and write a tutorial about how to simply:
- create a Gardener managed Kubernetes Cluster (Shoot) via kubectl
- install Istio as a preferred, production ready Ingress/Service Mesh (instead of the Nginx Ingress addon)
- attach your own custom domain to be managed by Gardener
- combine everything with certificates from Let’s Encrypt
Here are some pre-pointers that you will need to go deeper:
Tip
If you try my instructions and fail, then read the alternative title of this tutorial as “Shoot yourself in the foot with Gardener, custom Domains, Istio and Certificates”.First Things First
Login to your Gardener landscape, setup a project with adequate infrastructure credentials and then navigate to your account. Note down the name of your secret. I chose the GCP infrastructure from the vast possible options that my Gardener provides me with, so i had named the secret as shoot-operator-gcp.
From the Access widget (leave the default settings) download your personalized kubeconfig into ~/.kube/kubeconfig-garden-myproject. Follow the instructions to setup kubelogin:
For convinience, let us set an alias command with
alias kgarden="kubectl --kubeconfig ~/.kube/kubeconfig-garden-myproject.yaml"
kgarden now gives you all botanical powers and connects you directly with your Gardener.
You should now be able to run kgarden get shoots, automatically get an oidc token, and list already running clusters/shoots.
Prepare your Custom Domain
I am going to use Cloud Flare as programmatic DNS of my custom domain mydomain.io. Please follow detailed instructions from Cloud Flare on how to delegate your domain (the free account does not support delegating subdomains). Alternatively, AWS Route53 (and most others) support delegating subdomains.
I needed to follow these instructions and created the following secret:
apiVersion: v1
kind: Secret
metadata:
  name: cloudflare-mydomain-io
type: Opaque
data:
  CLOUDFLARE_API_TOKEN: useYOURownDAMITzNDU2Nzg5MDEyMzQ1Njc4OQ==
Apply this secret into your project with kgarden create -f cloudflare-mydomain-io.yaml.
Our External DNS Manager also supports Amazon Route53, Google CloudDNS, AliCloud DNS, Azure DNS, or OpenStack Designate. Check it out.
Prepare Gardener Extensions
I now need to prepare the Gardener extensions shoot-dns-service and shoot-cert-service and set the parameters accordingly.
Please note, that the availability of Gardener Extensions depends on how your administrator has configured the Gardener landscape. Please contact your Gardener administrator in case you experience any issues during activation.
The following snippet allows Gardener to manage my entire custom domain, whereas with the include: attribute I restrict all dynamic entries under the subdomain gsicdc.mydomain.io:
  dns:
    providers:
      - domains:
          include:
            - gsicdc.mydomain.io
        primary: false
        secretName: cloudflare-mydomain-io
        type: cloudflare-dns
  extensions:
    - type: shoot-dns-service
The next snipplet allows Gardener to manage certificates automatically from Let’s Encrypt on mydomain.io for me:
  extensions:
    - type: shoot-cert-service
      providerConfig:
        apiVersion: service.cert.extensions.gardener.cloud/v1alpha1
        issuers:
          - email: me@mail.com
            name: mydomain
            server: 'https://acme-v02.api.letsencrypt.org/directory'
          - email: me@mail.com
            name: mydomain-staging
            server: 'https://acme-staging-v02.api.letsencrypt.org/directory'
Adjust the snipplets with your parameters (don’t forget your email). And please use the mydomain-staging issuer while you are testing and learning. Otherwise, Let’s Encrypt will rate limit your frequent requests and you can wait a week until you can continue.
References for Let’s Encrypt:
Create the Gardener Shoot Cluster
Remember I chose to create the Shoot on GCP, so below is the simplest declarative shoot or cluster order document. Notice that I am referring to the infrastructure credentials with shoot-operator-gcp and I combined the above snippets into the yaml file:
apiVersion: core.gardener.cloud/v1beta1
kind: Shoot
metadata:
  name: gsicdc
spec:
  dns:
    providers:
    - domains:
        include:
          - gsicdc.mydomain.io
      primary: false
      secretName: cloudflare-mydomain-io
      type: cloudflare-dns
  extensions:
  - type: shoot-dns-service
  - type: shoot-cert-service
    providerConfig:
      apiVersion: service.cert.extensions.gardener.cloud/v1alpha1
      issuers:
        - email: me@mail.com
          name: mydomain
          server: 'https://acme-v02.api.letsencrypt.org/directory'
        - email: me@mail.com
          name: mydomain-staging
          server: 'https://acme-staging-v02.api.letsencrypt.org/directory'
  cloudProfileName: gcp
  kubernetes:
    version: 1.28.2
  maintenance:
    autoUpdate:
      kubernetesVersion: true
      machineImageVersion: true
  networking:
    nodes: 10.250.0.0/16
    pods: 100.96.0.0/11
    services: 100.64.0.0/13
    type: calico
  provider:
    controlPlaneConfig:
      apiVersion: gcp.provider.extensions.gardener.cloud/v1alpha1
      kind: ControlPlaneConfig
      zone: europe-west1-d
    infrastructureConfig:
      apiVersion: gcp.provider.extensions.gardener.cloud/v1alpha1
      kind: InfrastructureConfig
      networks:
        workers: 10.250.0.0/16
    type: gcp
    workers:
    - machine:
        image:
          name: gardenlinux
          version: 576.9.0
        type: n1-standard-2
      maxSurge: 1
      maxUnavailable: 0
      maximum: 2
      minimum: 1
      name: my-workerpool
      volume:
        size: 50Gi
        type: pd-standard
      zones:
      - europe-west1-d
  purpose: testing
  region: europe-west1
  secretBindingName: shoot-operator-gcp
Create your cluster and wait for it to be ready (about 5 to 7min).
$ kgarden create -f gsicdc.yaml
shoot.core.gardener.cloud/gsicdc created

$ kgarden get shoot gsicdc --watch
NAME     CLOUDPROFILE   VERSION   SEED   DOMAIN                                        HIBERNATION   OPERATION    PROGRESS   APISERVER     CONTROL       NODES     SYSTEM    AGE
gsicdc   gcp            1.28.2    gcp    gsicdc.myproject.shoot.devgarden.cloud   Awake         Processing   38         Progressing   Progressing   Unknown   Unknown   83s
...
gsicdc   gcp            1.28.2    gcp    gsicdc.myproject.shoot.devgarden.cloud   Awake         Succeeded    100        True          True          True          False         6m7s
Get access to your freshly baked cluster and set your KUBECONFIG:
$ kgarden get secrets gsicdc.kubeconfig -o jsonpath={.data.kubeconfig} | base64 -d >kubeconfig-gsicdc.yaml

$ export KUBECONFIG=$(pwd)/kubeconfig-gsicdc.yaml
$ kubectl get all
NAME                 TYPE        CLUSTER-IP   EXTERNAL-IP   PORT(S)   AGE
service/kubernetes   ClusterIP   100.64.0.1   <none>        443/TCP   89m
Install Istio
Please follow the Istio installation instructions and download istioctl. If you are on a Mac, I recommend:
I want to install Istio with a default profile and SDS enabled. Furthermore I pass the following annotations to the service object istio-ingressgateway in the istio-system namespace.
  annotations:
    cert.gardener.cloud/issuer: mydomain-staging
    cert.gardener.cloud/secretname: wildcard-tls
    dns.gardener.cloud/class: garden
    dns.gardener.cloud/dnsnames: "*.gsicdc.mydomain.io"
    dns.gardener.cloud/ttl: "120"
With these annotations three things now happen automatically:
- The External DNS Manager, provided to you as a service (
dns.gardener.cloud/class: garden), picks up the request and creates the wildcard DNS entry *.gsicdc.mydomain.io with a time to live of 120sec at your DNS provider. My provider Cloud Flare is very very quick (as opposed to some other services). You should be able to verify the entry with dig lovemygardener.gsicdc.mydomain.io within seconds. - The Certificate Management picks up the request as well and initiates a DNS01 protocol exchange with Let’s Encrypt; using the staging environment referred to with the issuer behind
mydomain-staging. - After aproximately 70sec (give and take) you will receive the wildcard certificate in the
wildcard-tls secret in the namespace istio-system.
Notice, that the namespace for the certificate secret is often the cause of many troubleshooting sessions: the secret must reside in the same namespace of the gateway.
Here is the istio-install script:
$ export domainname="*.gsicdc.mydomain.io"
$ export issuer="mydomain-staging"

$ cat <<EOF | istioctl install -y -f -
apiVersion: install.istio.io/v1alpha1
kind: IstioOperator
spec:
  profile: default
  components:
    ingressGateways:
    - name: istio-ingressgateway
      enabled: true
      k8s:
        serviceAnnotations:
          cert.gardener.cloud/issuer: "${issuer}"
          cert.gardener.cloud/secretname: wildcard-tls
          dns.gardener.cloud/class: garden
          dns.gardener.cloud/dnsnames: "${domainname}"
          dns.gardener.cloud/ttl: "120"
EOF
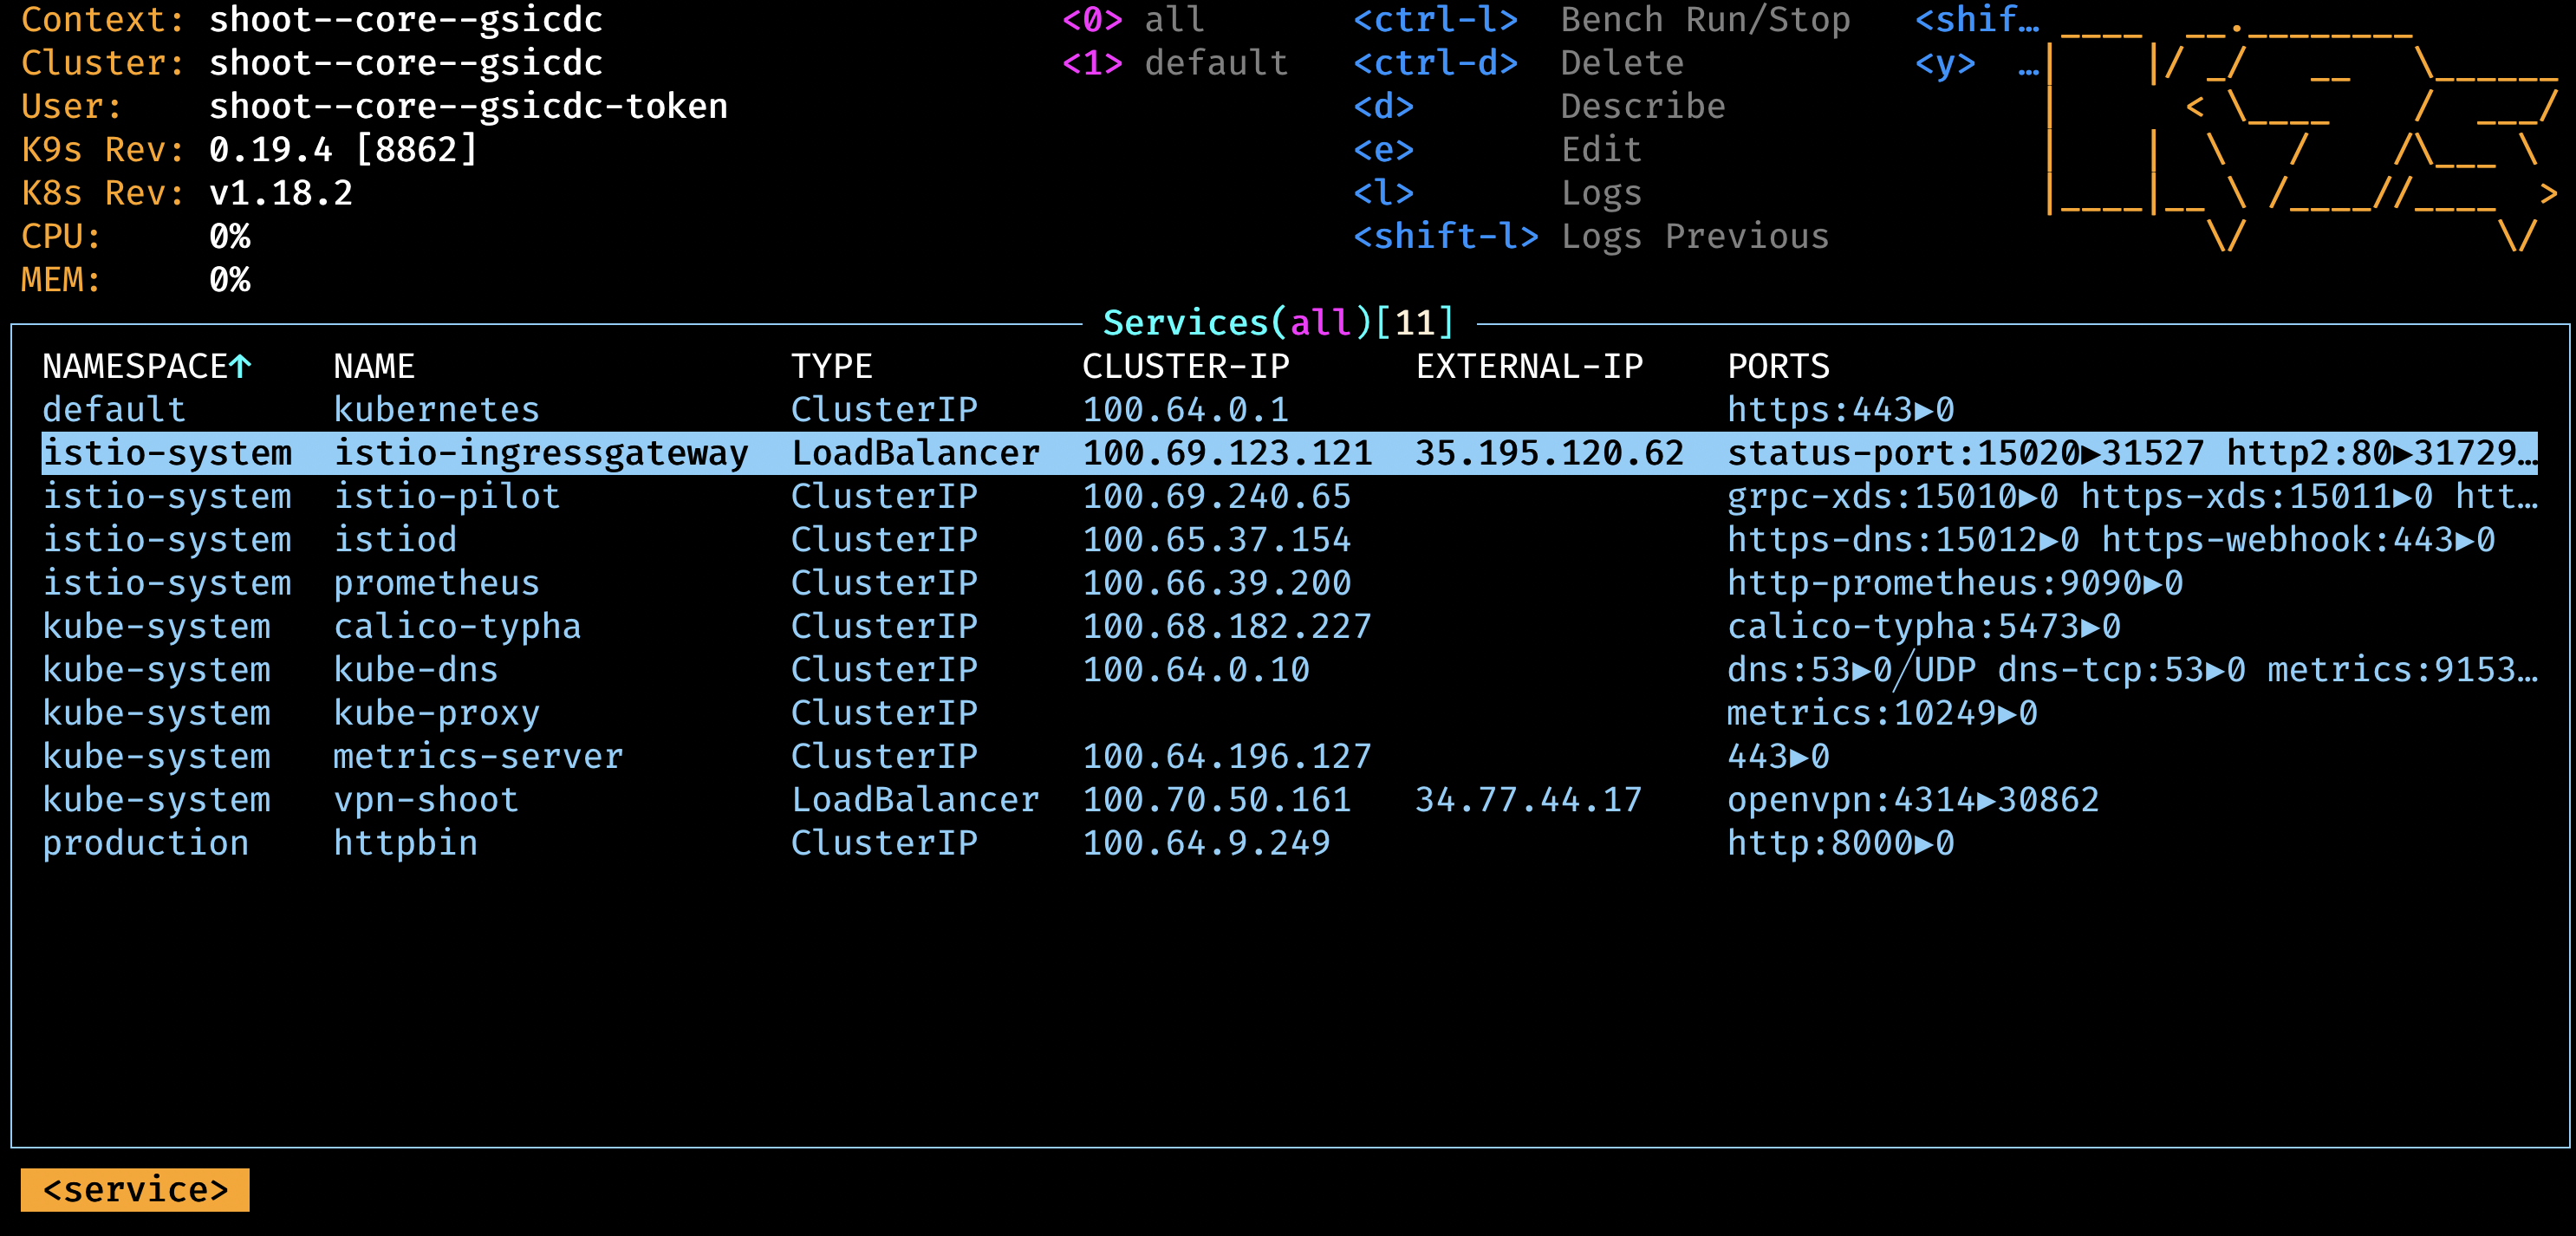
Verify that setup is working and that DNS and certificates have been created/delivered:
$ kubectl -n istio-system describe service istio-ingressgateway
<snip>
Events:
  Type    Reason                Age                From                     Message
  ----    ------                ----               ----                     -------
  Normal  EnsuringLoadBalancer  58s                service-controller       Ensuring load balancer
  Normal  reconcile             58s                cert-controller-manager  created certificate object istio-system/istio-ingressgateway-service-pwqdm
  Normal  cert-annotation       58s                cert-controller-manager  wildcard-tls: cert request is pending
  Normal  cert-annotation       54s                cert-controller-manager  wildcard-tls: certificate pending: certificate requested, preparing/waiting for successful DNS01 challenge
  Normal  cert-annotation       28s                cert-controller-manager  wildcard-tls: certificate ready
  Normal  EnsuredLoadBalancer   26s                service-controller       Ensured load balancer
  Normal  reconcile             26s                dns-controller-manager   created dns entry object shoot--core--gsicdc/istio-ingressgateway-service-p9qqb
  Normal  dns-annotation        26s                dns-controller-manager   *.gsicdc.mydomain.io: dns entry is pending
  Normal  dns-annotation        21s (x3 over 21s)  dns-controller-manager   *.gsicdc.mydomain.io: dns entry active

$ dig lovemygardener.gsicdc.mydomain.io

; <<>> DiG 9.10.6 <<>> lovemygardener.gsicdc.mydomain.io
<snip>
;; ANSWER SECTION:
lovemygardener.gsicdc.mydomain.io. 120 IN A	35.195.120.62
<snip>
There you have it, the wildcard-tls certificate is ready and the *.gsicdc.mydomain.io dns entry is active. Traffic will be going your way.
Another set of fine tools to use are kapp (formerly known as k14s), k9s and HTTPie. While we are at it, let’s install them all. If you are on a Mac, I recommend:
brew tap vmware-tanzu/carvel
brew install ytt kbld kapp kwt imgpkg vendir
brew install derailed/k9s/k9s
brew install httpie
Ingress at Your Service
Networking is a central part of Kubernetes, but it can be challenging to understand exactly how it is expected to work. You should learn about Kubernetes networking, and first try to debug problems yourself. With a solid managed cluster from Gardener, it is always PEBCAK!
Kubernetes Ingress is a subject that is evolving to much broader standard. Please watch Evolving the Kubernetes Ingress APIs to GA and Beyond for a good introduction. In this example, I did not want to use the Kubernetes Ingress compatibility option of Istio. Instead, I used VirtualService and Gateway from the Istio’s API group networking.istio.io/v1 directly, and enabled istio-injection generically for the namespace.
I use httpbin as service that I want to expose to the internet, or where my ingress should be routed to (depends on your point of view, I guess).
apiVersion: v1
kind: Namespace
metadata:
  name: production
  labels:
    istio-injection: enabled
---
apiVersion: v1
kind: Service
metadata:
  name: httpbin
  namespace: production
  labels:
    app: httpbin
spec:
  ports:
  - name: http
    port: 8000
    targetPort: 80
  selector:
    app: httpbin
---
apiVersion: apps/v1
kind: Deployment
metadata:
  name: httpbin
  namespace: production
spec:
  replicas: 1
  selector:
    matchLabels:
      app: httpbin
  template:
    metadata:
      labels:
        app: httpbin
    spec:
      containers:
      - image: docker.io/kennethreitz/httpbin
        imagePullPolicy: IfNotPresent
        name: httpbin
        ports:
        - containerPort: 80
---
apiVersion: networking.istio.io/v1
kind: Gateway
metadata:
  name: httpbin-gw
  namespace: production
spec:
  selector:
    istio: ingressgateway #! use istio default ingress gateway
  servers:
  - port:
      number: 80
      name: http
      protocol: HTTP
    tls:
      httpsRedirect: true
    hosts:
    - "httpbin.gsicdc.mydomain.io"
  - port:
      number: 443
      name: https
      protocol: HTTPS
    tls:
      mode: SIMPLE
      credentialName: wildcard-tls
    hosts:
    - "httpbin.gsicdc.mydomain.io"
---
apiVersion: networking.istio.io/v1
kind: VirtualService
metadata:
  name: httpbin-vs
  namespace: production
spec:
  hosts:
  - "httpbin.gsicdc.mydomain.io"
  gateways:
  - httpbin-gw
  http:
  - match:
    - uri:
        regex: /.*
    route:
    - destination:
        port:
          number: 8000
        host: httpbin
---
Let us now deploy the whole package of Kubernetes primitives using kapp:
$ kapp deploy -a httpbin -f httpbin-kapp.yaml
Target cluster 'https://api.gsicdc.myproject.shoot.devgarden.cloud' (nodes: shoot--myproject--gsicdc-my-workerpool-z1-6586c8f6cb-x24kh)

Changes

Namespace   Name        Kind            Conds.  Age  Op      Wait to    Rs  Ri
(cluster)   production  Namespace       -       -    create  reconcile  -   -
production  httpbin     Deployment      -       -    create  reconcile  -   -
^           httpbin     Service         -       -    create  reconcile  -   -
^           httpbin-gw  Gateway         -       -    create  reconcile  -   -
^           httpbin-vs  VirtualService  -       -    create  reconcile  -   -

Op:      5 create, 0 delete, 0 update, 0 noop
Wait to: 5 reconcile, 0 delete, 0 noop

Continue? [yN]: y

5:36:31PM: ---- applying 1 changes [0/5 done] ----
<snip>
5:37:00PM: ok: reconcile deployment/httpbin (apps/v1) namespace: production
5:37:00PM: ---- applying complete [5/5 done] ----
5:37:00PM: ---- waiting complete [5/5 done] ----

Succeeded
Let’s finally test the service (Of course you can use the browser as well):
$ http httpbin.gsicdc.mydomain.io
HTTP/1.1 301 Moved Permanently
content-length: 0
date: Wed, 13 May 2020 21:29:13 GMT
location: https://httpbin.gsicdc.mydomain.io/
server: istio-envoy

$ curl -k https://httpbin.gsicdc.mydomain.io/ip
{
    "origin": "10.250.0.2"
}
Quod erat demonstrandum.
The proof of exchanging the issuer is now left to the reader.
Tip
Remember that the certificate is actually not valid because it is issued from the Let’s encrypt staging environment. Thus, we needed “curl -k” or “http –verify no”.Hint: use the interactive k9s tool.
Cleanup
Remove the cloud native application:
$ kapp ls
Apps in namespace 'default'

Name     Namespaces            Lcs   Lca
httpbin  (cluster),production  true  17m

$ kapp delete -a httpbin
...
Continue? [yN]: y
...
11:47:47PM: ---- waiting complete [8/8 done] ----

Succeeded
Remove Istio:
$ istioctl x uninstall --purge
clusterrole.rbac.authorization.k8s.io "prometheus-istio-system" deleted
clusterrolebinding.rbac.authorization.k8s.io "prometheus-istio-system" deleted
...
Delete your Shoot:
kgarden annotate shoot gsicdc confirmation.gardener.cloud/deletion=true --overwrite
kgarden delete shoot gsicdc --wait=false
7 - Gateway Api Gateways
Using annotated Gateway API Gateway and/or HTTPRoutes as Source
This tutorial describes how to use annotated Gateway API resources as source for Certificate.
Install Istio on your cluster
Follow the Istio Kubernetes Gateway API to
install the Gateway API and to install Istio.
These are the typical commands for the Istio installation with the Kubernetes Gateway API:
export KUEBCONFIG=...
curl -L https://istio.io/downloadIstio | sh -
kubectl get crd gateways.gateway.networking.k8s.io &> /dev/null || \
  { kubectl kustomize "github.com/kubernetes-sigs/gateway-api/config/crd?ref=v1.0.0" | kubectl apply -f -; }
istioctl install --set profile=minimal -y
kubectl label namespace default istio-injection=enabled
Verify that Gateway Source works
Install a sample service
With automatic sidecar injection:
$ kubectl apply -f https://raw.githubusercontent.com/istio/istio/release-1.20/samples/httpbin/httpbin.yaml
Note: The sample service is not used in the following steps. It is deployed for illustration purposes only.
To use it with certificates, you have to add an HTTPS port for it.
Using a Gateway as a source
Deploy the Gateway API configuration including a single exposed route (i.e., /get):
kubectl create namespace istio-ingress
kubectl apply -f - <<EOF
apiVersion: gateway.networking.k8s.io/v1beta1
kind: Gateway
metadata:
  name: gateway
  namespace: istio-ingress
  annotations:
    #cert.gardener.cloud/dnsnames: "*.example.com" # alternative if you want to control the dns names explicitly.
    cert.gardener.cloud/purpose: managed
spec:
  gatewayClassName: istio
  listeners:
  - name: default
    hostname: "*.example.com"  # this is used by cert-controller-manager to extract DNS names
    port: 443
    protocol: HTTPS
    allowedRoutes:
      namespaces:
        from: All
    tls:                       # important: tls section must be defined with exactly one certificateRefs item
      certificateRefs:
        - name: foo-example-com
---
apiVersion: gateway.networking.k8s.io/v1beta1
kind: HTTPRoute
metadata:
  name: http
  namespace: default
spec:
  parentRefs:
  - name: gateway
    namespace: istio-ingress
  hostnames: ["httpbin.example.com"]  # this is used by cert-controller-manager to extract DNS names too
  rules:
  - matches:
    - path:
        type: PathPrefix
        value: /get
    backendRefs:
    - name: httpbin
      port: 8000
EOF
You should now see a created Certificate resource similar to:
$ kubectl -n istio-ingress get cert -oyaml
apiVersion: v1
items:
- apiVersion: cert.gardener.cloud/v1alpha1
  kind: Certificate
  metadata:
    generateName: gateway-gateway-
    name: gateway-gateway-kdw6h
    namespace: istio-ingress
    ownerReferences:
    - apiVersion: gateway.networking.k8s.io/v1
      blockOwnerDeletion: true
      controller: true
      kind: Gateway
      name: gateway
  spec:
    commonName: '*.example.com'
    secretName: foo-example-com
  status:
    ...
kind: List
metadata:
  resourceVersion: ""
Using a HTTPRoute as a source
If the Gateway resource is annotated with cert.gardener.cloud/purpose: managed,
hostnames from all referencing HTTPRoute resources are automatically extracted.
These resources don’t need an additional annotation.
Deploy the Gateway API configuration including a single exposed route (i.e., /get):
kubectl create namespace istio-ingress
kubectl apply -f - <<EOF
apiVersion: gateway.networking.k8s.io/v1beta1
kind: Gateway
metadata:
  name: gateway
  namespace: istio-ingress
  annotations:
    cert.gardener.cloud/purpose: managed
spec:
  gatewayClassName: istio
  listeners:
  - name: default
    hostname: null  # not set
    port: 443
    protocol: HTTPS
    allowedRoutes:
      namespaces:
        from: All
    tls:                            # important: tls section must be defined with exactly one certificateRefs item
      certificateRefs:
        - name: foo-example-com
---
apiVersion: gateway.networking.k8s.io/v1beta1
kind: HTTPRoute
metadata:
  name: http
  namespace: default
spec:
  parentRefs:
  - name: gateway
    namespace: istio-ingress
  hostnames: ["httpbin.example.com"]  # this is used by dns-controller-manager to extract DNS names too
  rules:
  - matches:
    - path:
        type: PathPrefix
        value: /get
    backendRefs:
    - name: httpbin
      port: 8000
EOF
This should show a similar Certificate resource as above.
8 - Istio Gateways
Using annotated Istio Gateway and/or Istio Virtual Service as Source
This tutorial describes how to use annotated Istio Gateway resources as source for Certificate resources.
Install Istio on your cluster
Follow the Istio Getting Started to download and install Istio.
These are the typical commands for the istio demo installation
export KUEBCONFIG=...
curl -L https://istio.io/downloadIstio | sh -
istioctl install --set profile=demo -y
kubectl label namespace default istio-injection=enabled
Note: If you are using a KinD cluster, the istio-ingressgateway service may be pending forever.
$ kubectl -n istio-system get svc istio-ingressgateway
NAME                   TYPE           CLUSTER-IP     EXTERNAL-IP   PORT(S)                                                                      AGE
istio-ingressgateway   LoadBalancer   10.96.88.189   <pending>     15021:30590/TCP,80:30185/TCP,443:30075/TCP,31400:30129/TCP,15443:30956/TCP   13m
In this case, you may patch the status for demo purposes (of course it still would not accept connections)
kubectl -n istio-system patch svc istio-ingressgateway --type=merge --subresource status --patch '{"status":{"loadBalancer":{"ingress":[{"ip":"1.2.3.4"}]}}}'
Verify that Istio Gateway/VirtualService Source works
Install a sample service
With automatic sidecar injection:
$ kubectl apply -f https://raw.githubusercontent.com/istio/istio/release-1.20/samples/httpbin/httpbin.yaml
Using a Gateway as a source
Create an Istio Gateway:
$ cat <<EOF | kubectl apply -f -
apiVersion: networking.istio.io/v1
kind: Gateway
metadata:
  name: httpbin-gateway
  namespace: istio-system
  annotations:
    #cert.gardener.cloud/dnsnames: "*.example.com" # alternative if you want to control the dns names explicitly.
    cert.gardener.cloud/purpose: managed
spec:
  selector:
    istio: ingressgateway # use Istio default gateway implementation
  servers:
  - port:
      number: 443
      name: http
      protocol: HTTPS
    hosts:
    - "httpbin.example.com" # this is used by the dns-controller-manager to extract DNS names
    tls:
      credentialName: my-tls-secret
EOF
You should now see a created Certificate resource similar to:
$ kubectl -n istio-system get cert -oyaml
apiVersion: v1
items:
- apiVersion: cert.gardener.cloud/v1alpha1
  kind: Certificate
  metadata:
    generateName: httpbin-gateway-gateway-
    name: httpbin-gateway-gateway-hdbjb
    namespace: istio-system
    ownerReferences:
    - apiVersion: networking.istio.io/v1
      blockOwnerDeletion: true
      controller: true
      kind: Gateway
      name: httpbin-gateway
  spec:
    commonName: httpbin.example.com
    secretName: my-tls-secret
  status:
    ...
kind: List
metadata:
  resourceVersion: ""
Using a VirtualService as a source
If the Gateway resource is annotated with cert.gardener.cloud/purpose: managed,
hosts from all referencing VirtualServices resources are automatically extracted.
These resources don’t need an additional annotation.
Create an Istio Gateway:
$ cat <<EOF | kubectl apply -f -
apiVersion: networking.istio.io/v1
kind: Gateway
metadata:
  name: httpbin-gateway
  namespace: istio-system
  annotations:
    cert.gardener.cloud/purpose: managed
spec:
  selector:
    istio: ingressgateway # use Istio default gateway implementation
  servers:
  - port:
      number: 443
      name: https
      protocol: HTTPS
    hosts:
    - "*"
    tls:
      credentialName: my-tls-secret
EOF
$ cat <<EOF | kubectl apply -f -
apiVersion: networking.istio.io/v1
kind: VirtualService
metadata:
  name: httpbin
  namespace: default
spec:
  hosts:
  - "httpbin.example.com" # this is used by dns-controller-manager to extract DNS names
  gateways:
  - istio-system/httpbin-gateway
  http:
  - match:
    - uri:
        prefix: /status
    - uri:
        prefix: /delay
    route:
    - destination:
        port:
          number: 8000
        host: httpbin
EOF
This should show a similar Certificate resource as above.