This is the multi-page printable view of this section. Click here to print.
Set Up Client Tools
1 - Fun with kubectl Aliases
Speed up Your Terminal Workflow
Use the Kubernetes command-line tool, kubectl, to deploy and manage applications on Kubernetes. Using kubectl, you can inspect cluster resources, as well as create, delete, and update components.

You will probably run more than a hundred kubectl commands on some days and you should speed up your terminal workflow with with some shortcuts. Of course, there are good shortcuts and bad shortcuts (lazy coding, lack of security review, etc.), but let’s stick with the positives and talk about a good shortcut: bash aliases in your .profile.
What are those mysterious .profile and .bash_profile files you’ve heard about?
Note
The contents of a .profile file are executed on every log-in of the owner of the file
What’s the .bash_profile then? It’s exactly the same, but under a different name. The unix shell you are logging into, in this case OS X, looks for etc/profile and loads it if it exists. Then it looks for ~/.bash_profile, ~/.bash_login and finally ~/.profile, and loads the first one of these it finds.
Populating the .profile File
Here is the fantastic time saver that needs to be in your shell profile:
# time save number one. shortcut for kubectl
#
alias k="kubectl"

# Start a shell in a pod AND kill them after leaving
#
alias ksh="kubectl run busybox -i --tty --image=busybox --restart=Never --rm -- sh"

# opens a bash
#
alias kbash="kubectl run busybox -i --tty --image=busybox --restart=Never --rm -- ash"

# activate/exports the kuberconfig.yaml in the current working directory
#
alias kexport="export KUBECONFIG=`pwd`/kubeconfig.yaml"


# usage: kurl http://your-svc.namespace.cluster.local
#
# we need for this our very own image...never trust an unknown image..
alias kurl="docker run --rm byrnedo/alpine-curl"
All the kubectl tab completions still work fine with these aliases, so you’re not losing that speed.
Note
If the approach above does not work for you, add the following lines in your ~/.bashrc instead:
# time save number one. shortcut for kubectl
#
alias k="kubectl"

# Enable kubectl completion
source <(k completion bash | sed s/kubectl/k/g)
2 - Kubeconfig Context as bash Prompt
Overview
Use the Kubernetes command-line tool, kubectl, to deploy and manage applications on Kubernetes. Using kubectl, you can inspect cluster resources, as well as create, delete, and update components.

By default, the kubectl configuration is located at ~/.kube/config.
Let us suppose that you have two clusters, one for development work and one for scratch work.
How to handle this easily without copying the used configuration always to the right place?
Export the KUBECONFIG Environment Variable
bash$ export KUBECONFIG=<PATH-TO-M>-CONFIG>/kubeconfig-dev.yaml
How to determine which cluster is used by the kubectl command?
Determine Active Cluster
bash$ kubectl cluster-info
Kubernetes master is running at https://api.dev.garden.shoot.canary.k8s-hana.ondemand.com
KubeDNS is running at https://api.dev.garden.shoot.canary.k8s-hana.ondemand.com/api/v1/proxy/namespaces/kube-system/services/kube-dns

To further debug and diagnose cluster problems, use 'kubectl cluster-info dump'.
bash$
Display Cluster in the bash - Linux and Alike
I found this tip on Stackoverflow and find it worth to be added here.
Edit your ~/.bash_profile and add the following code snippet to show the current K8s context in the shell’s prompt:
prompt_k8s(){
  k8s_current_context=$(kubectl config current-context 2> /dev/null)
  if [[ $? -eq 0 ]] ; then echo -e "(${k8s_current_context}) "; fi
}


PS1+='$(prompt_k8s)'
After this, your bash command prompt contains the active KUBECONFIG context and you always know which cluster is active - develop or production.
For example:
bash$ export KUBECONFIG=/Users/d023280/Documents/workspace/gardener-ui/kubeconfig_gardendev.yaml
bash (garden_dev)$
Note the (garden_dev) prefix in the bash command prompt.
This helps immensely to avoid thoughtless mistakes.
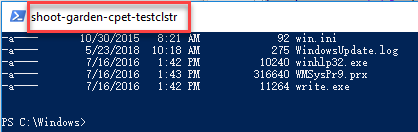
Display Cluster in the PowerShell - Windows
Display the current K8s cluster in the title of PowerShell window.
Create a profile file for your shell under %UserProfile%\Documents\WindowsPowerShell\Microsoft.PowerShell_profile.ps1
Copy following code to Microsoft.PowerShell_profile.ps1
 function prompt_k8s {
     $k8s_current_context = (kubectl config current-context) | Out-String
     if($?) {
         return $k8s_current_context
     }else {
         return "No K8S contenxt found"
     }
 }

 $host.ui.rawui.WindowTitle = prompt_k8s
If you want to switch to different cluster, you can set KUBECONFIG to new value, and re-run the file Microsoft.PowerShell_profile.ps1
3 - Organizing Access Using kubeconfig Files
Overview
The kubectl command-line tool uses kubeconfig files to find the information it needs to choose a cluster and communicate with the API server of a cluster.
Problem
If you’ve become aware of a security breach that affects you, you may want to revoke or cycle credentials in case anything was leaked. However, this is not possible with the initial or master kubeconfig from your cluster.

Pitfall
Never distribute the kubeconfig, which you can download directly within the Gardener dashboard, for a productive cluster.
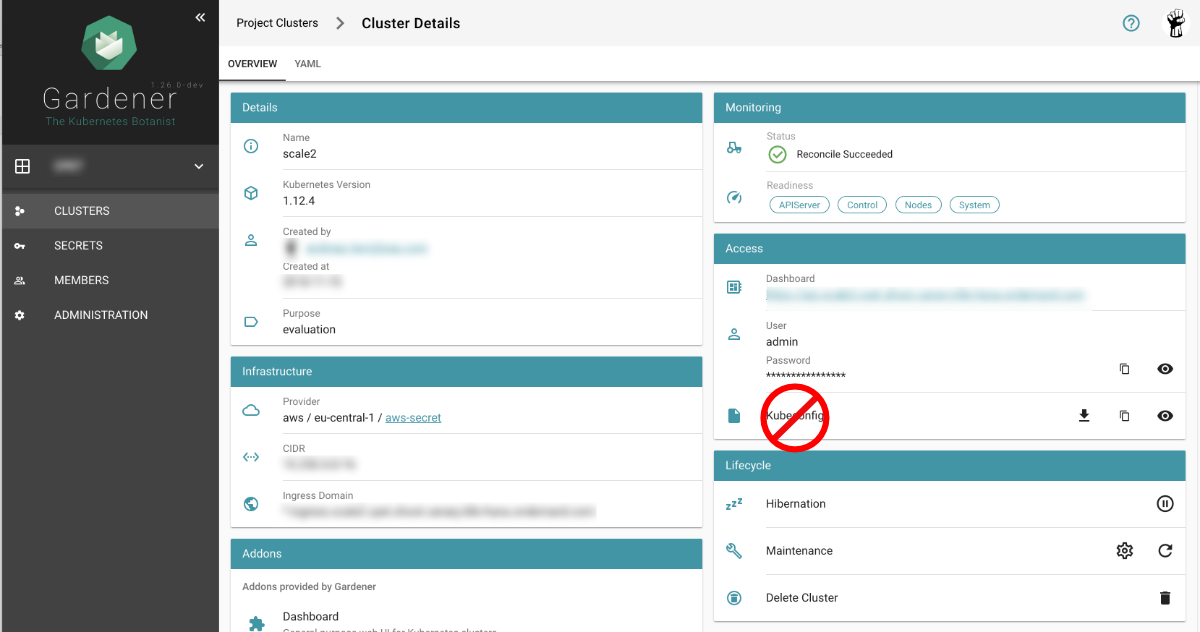
Create a Custom kubeconfig File for Each User
Create a separate kubeconfig for each user. One of the big advantages of this approach is that you can revoke them and control the permissions better. A limitation to single namespaces is also possible here.
The script creates a new ServiceAccount with read privileges in the whole cluster (Secrets are excluded).
To run the script, Deno, a secure TypeScript runtime, must be installed.
#!/usr/bin/env -S deno run --allow-run

/*
* This script create Kubernetes ServiceAccount and other required resource and print KUBECONFIG to console.
* Depending on your requirements you might want change clusterRoleBindingTemplate() function
*
* In order to execute this script it's required to install Deno.js https://deno.land/ (TypeScript & JavaScript runtime).
* It's single executable binary for the major OSs from the original author of the Node.js
* example: deno run --allow-run kubeconfig-for-custom-user.ts d00001
* example: deno run --allow-run kubeconfig-for-custom-user.ts d00001 --delete
*
* known issue: shebang does works under the Linux but not for Windows Linux Subsystem
*/

const KUBECTL = "/usr/local/bin/kubectl" //or
// const KUBECTL = "C:\\Program Files\\Docker\\Docker\\resources\\bin\\kubectl.exe"

const serviceAccName = Deno.args[0]
const deleteIt = Deno.args[1]
if (serviceAccName == undefined || serviceAccName == "--delete" ) {
    console.log("please provide username as an argument, for example: deno run --allow-run kubeconfig-for-custom-user.ts USER_NAME [--delete]")
    Deno.exit(1)
}

if (deleteIt == "--delete") {
    exec([KUBECTL, "delete", "serviceaccount", serviceAccName])
    exec([KUBECTL, "delete", "secret", `${serviceAccName}-secret`])
    exec([KUBECTL, "delete", "clusterrolebinding", `view-${serviceAccName}-global`])
    Deno.exit(0)
}

await exec([KUBECTL, "create", "serviceaccount", serviceAccName, "-o", "json"])

await exec([KUBECTL, "create", "-o", "json", "-f", "-"], secretYamlTemplate())
let secret = await exec([KUBECTL, "get", "secret", `${serviceAccName}-secret`, "-o", "json"])
let caCRT = secret.data["ca.crt"];
let userToken = atob(secret.data["token"]); //decode base64

let kubeConfig = await exec([KUBECTL, "config", "view", "--minify", "-o", "json"]);
let clusterApi = kubeConfig.clusters[0].cluster.server
let clusterName = kubeConfig.clusters[0].name

await exec([KUBECTL, "create", "-o", "json", "-f", "-"], clusterRoleBindingTemplate())

console.log(kubeConfigTemplate(caCRT, userToken, clusterApi, clusterName, serviceAccName + "-" + clusterName))

async function exec(args: string[], stdInput?: string): Promise<Object> {
    console.log("# "+args.join(" "))
    let opt: Deno.RunOptions = {
        cmd: args,
        stdout: "piped",
        stderr: "piped",
        stdin: "piped",
    };

    const p = Deno.run(opt);

    if (stdInput != undefined) {
        await p.stdin.write(new TextEncoder().encode(stdInput));
        await p.stdin.close();
    }

    const status = await p.status()
    const output = await p.output()
    const stderrOutput = await p.stderrOutput()
    if (status.code === 0) {
        return JSON.parse(new TextDecoder().decode(output))
    } else {
        let error = new TextDecoder().decode(stderrOutput);
        return ""
    }
}

function clusterRoleBindingTemplate() {
    return `
apiVersion: rbac.authorization.k8s.io/v1
kind: ClusterRoleBinding
metadata:
  name: view-${serviceAccName}-global
subjects:
- kind: ServiceAccount
  name: ${serviceAccName}
  namespace: default
roleRef:
  kind: ClusterRole
  name: view
  apiGroup: rbac.authorization.k8s.io
`
}

function secretYamlTemplate() {
    return `
apiVersion: v1
kind: Secret
metadata:
  name: ${serviceAccName}-secret
  annotations:
    kubernetes.io/service-account.name: ${serviceAccName}
type: kubernetes.io/service-account-token`
}

function kubeConfigTemplate(certificateAuthority: string, token: string, clusterApi: string, clusterName: string, username: string) {
    return `
## KUBECONFIG generated on ${new Date()}
apiVersion: v1
clusters:
- cluster:
    certificate-authority-data: ${certificateAuthority}
    server: ${clusterApi}
  name: ${clusterName}
contexts:
- context:
    cluster: ${clusterName}
    user: ${username}
  name: ${clusterName}
current-context: ${clusterName}
kind: Config
preferences: {}
users:
- name: ${username}
  user:
    token: ${token}
`
}
If edit or admin rights are to be assigned, the ClusterRoleBinding must be adapted in the roleRef section
with the roles listed below.
Furthermore, you can restrict this to a single namespace by not creating a ClusterRoleBinding but only a RoleBinding
within the desired namespace.
| Default ClusterRole | Default ClusterRoleBinding | Description |
|---|---|---|
| cluster-admin | system:masters group | Allows super-user access to perform any action on any resource. When used in a ClusterRoleBinding, it gives full control over every resource in the cluster and in all namespaces. When used in a RoleBinding, it gives full control over every resource in the rolebinding’s namespace, including the namespace itself. |
| admin | None | Allows admin access, intended to be granted within a namespace using a RoleBinding. If used in a RoleBinding, allows read/write access to most resources in a namespace, including the ability to create roles and rolebindings within the namespace. It does not allow write access to resource quota or to the namespace itself. |
| edit | None | Allows read/write access to most objects in a namespace. It does not allow viewing or modifying roles or rolebindings. |
| view | None | Allows read-only access to see most objects in a namespace. It does not allow viewing roles or rolebindings. It does not allow viewing secrets, since those are escalating. |