Authenticating with an Identity Provider
Prerequisites
Please read the following background material on OIDC tokens and Structured Authentication.
Overview
Kubernetes on its own doesn’t provide any user management. In other words, users aren’t managed through Kubernetes resources. Whenever you refer to a human user it’s sufficient to use a unique ID, for example, an email address. Nevertheless, Gardener project owners can use an identity provider to authenticate user access for shoot clusters in the following way:
- Configure an Identity Provider using OpenID Connect (OIDC).
- Configure a local kubectl oidc-login to enable
oidc-login. - Configure the shoot cluster to share details of the OIDC-compliant identity provider with the Kubernetes API Server.
- Authorize an authenticated user using role-based access control (RBAC).
- Verify the result
NOTE
Gardener allows administrators to modify aspects of the control plane setup. It gives administrators full control of how the control plane is parameterized. While this offers much flexibility, administrators need to ensure that they don’t configure a control plane that goes beyond the service level agreements of the responsible operators team.
Configure an Identity Provider
Create a tenant in an OIDC compatible Identity Provider. For simplicity, we use Auth0, which has a free plan.
In your tenant, create a client application to use authentication with
kubectl: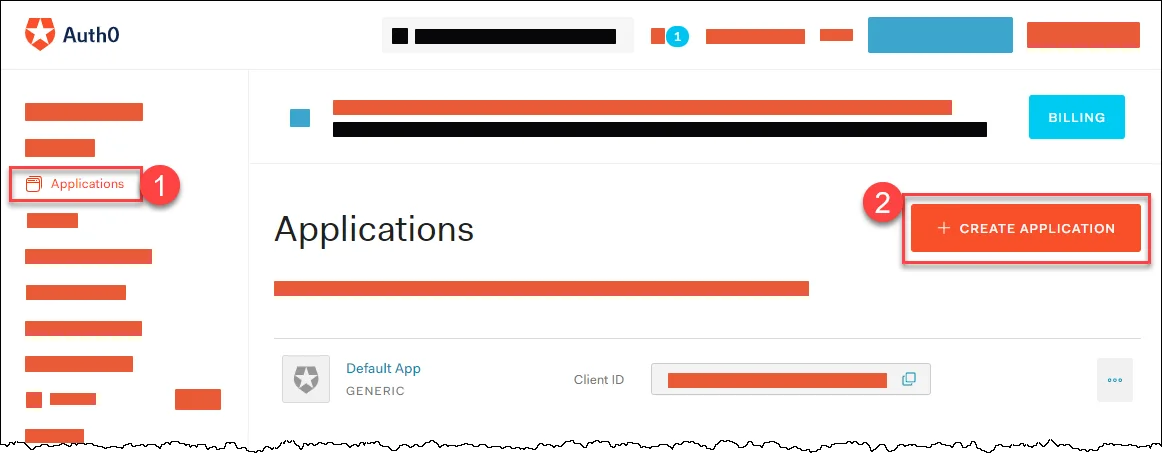
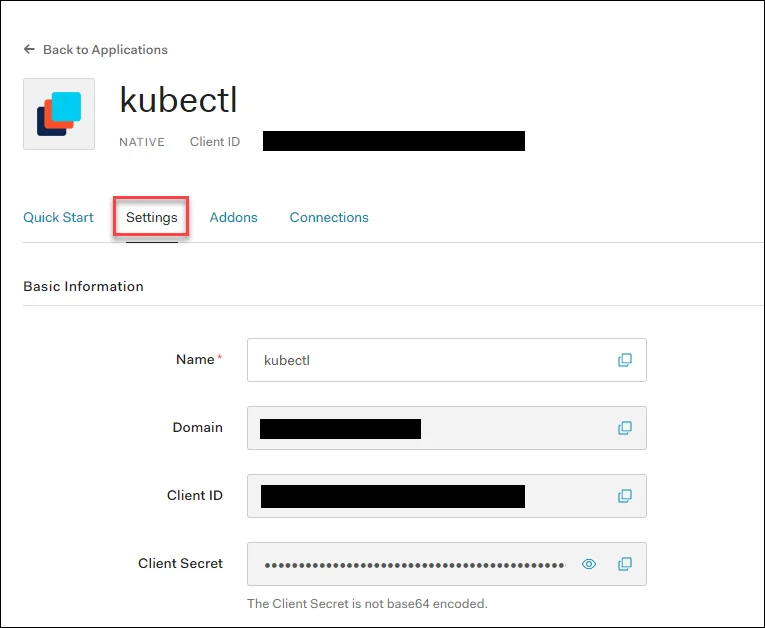
Provide a Name, choose Native as application type, and choose CREATE.

In the tab Settings, copy the following parameters to a local text file:
Domain
Corresponds to the issuer in OIDC. It must be an
https-secured endpoint (Auth0 requires a trailing/at the end). For more information, see Issuer Identifier.Client ID
Client Secret
Configure the client to have a callback url of
http://localhost:8000. This callback connects to your localkubectl oidc-loginplugin:
Save your changes.
Verify that
https://<Auth0 Domain>/.well-known/openid-configurationis reachable.Choose Users & Roles > Users > CREATE USERS to create a user with a user and password:
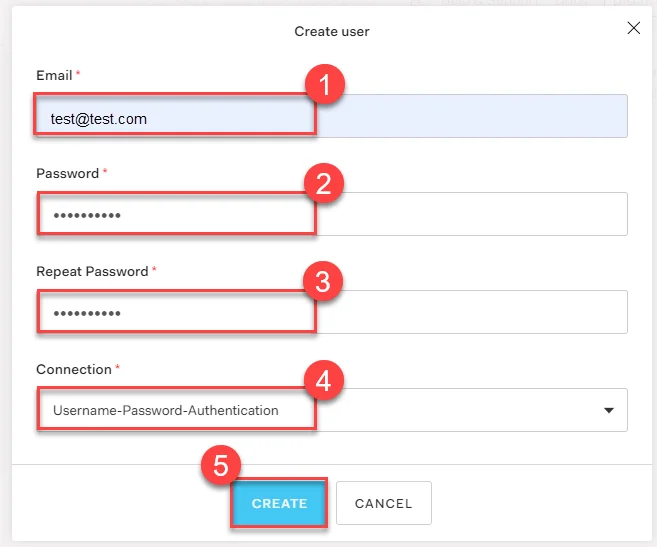
NOTE
Users must have a verified email address.
Configure a Local kubectl oidc-login
Install the
kubectlplugin oidc-login. We highly recommend the krew installation tool, which also makes other plugins easily available.consolekubectl krew install oidc-loginThe response looks like this:
consoleUpdated the local copy of plugin index. Installing plugin: oidc-login CAVEATS: \ | You need to setup the OIDC provider, Kubernetes API server, role binding and kubeconfig. | See https://github.com/int128/kubelogin for more. / Installed plugin: oidc-loginPrepare a
kubeconfigfor later use:consolecp ~/.kube/config ~/.kube/config-oidcModify the configuration of
~/.kube/config-oidcas follows:yamlapiVersion: v1 kind: Config ... contexts: - context: cluster: shoot--project--mycluster user: my-oidc name: shoot--project--mycluster ... users: - name: my-oidc user: exec: apiVersion: client.authentication.k8s.io/v1beta1 command: kubectl args: - oidc-login - get-token - --oidc-issuer-url=https://<Issuer>/ - --oidc-client-id=<Client ID> - --oidc-client-secret=<Client Secret> - --oidc-extra-scope=email,offline_access,profile
To test our OIDC-based authentication, the context shoot--project--mycluster of ~/.kube/config-oidc is used in a later step. For now, continue to use the configuration ~/.kube/config with administration rights for your cluster.
Configure the Shoot Cluster
Create a AuthenticationConfiguration configmap in the project's namespace. For more options, check out Gardener Structured Authentication and Kubernetes Structured Authentication documentation.
apiVersion: v1
kind: ConfigMap
metadata:
  name: authentication-config
  namespace: garden-project
data:
  config.yaml: |
    apiVersion: apiserver.config.k8s.io/v1beta1
    kind: AuthenticationConfiguration
    jwt:
    - issuer:
        url: https://<Issuer>/
        audiences:
        - <Client ID>
      claimMappings:
        username:
          claim: 'email'
        prefix: 'unique-issuer-identifier:'
Modify the shoot cluster YAML as follows, using the client ID and the domain (as issuer) from the settings of the client application you created in Auth0:
kind: Shoot
apiVersion: garden.sapcloud.io/v1beta1
metadata:
  name: mycluster
  namespace: garden-project
...
spec:
  kubernetes:
    kubeAPIServer:
      structuredAuthentication:
        configMapName: authentication-config
This change of the Shoot manifest triggers a reconciliation. Once the reconciliation is finished, your OIDC configuration is applied. It doesn't invalidate other certificate-based authentication methods. Wait for Gardener to reconcile the change. It can take up to 5 minutes.
Authorize an Authenticated User
In Auth0, you created a user with a verified email address, test@test.com in our example. For simplicity, we authorize a single user identified by this email address with the cluster role view:
IMPORTANT
Do not forget to add the unique prefix to the name of the user.
apiVersion: rbac.authorization.k8s.io/v1
kind: ClusterRoleBinding
metadata:
  name: viewer-test
roleRef:
  apiGroup: rbac.authorization.k8s.io
  kind: ClusterRole
  name: view
subjects:
- apiGroup: rbac.authorization.k8s.io
  kind: User
  name: unique-issuer-identifier:test@test.com
As administrator, apply the cluster role binding in your shoot cluster.
Verify the Result
To step into the shoes of your user, use the prepared
kubeconfigfile~/.kube/config-oidc, and switch to the context that usesoidc-login:consolecd ~/.kube export KUBECONFIG=$(pwd)/config-oidc kubectl config use-context `shoot--project--mycluster`kubectldelegates the authentication to pluginoidc-loginthe first time the user useskubectlto contact the API server, for example:consolekubectl get allThe plugin opens a browser for an interactive authentication session with Auth0, and in parallel serves a local webserver for the configured callback.
Enter your login credentials.
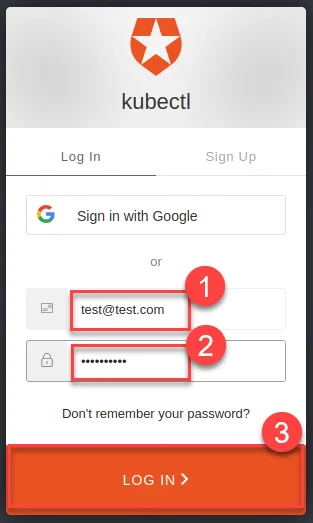
You should get a successful response from the API server:
Opening in existing browser session.
NAME                 TYPE        CLUSTER-IP   EXTERNAL-IP   PORT(S)   AGE
service/kubernetes   ClusterIP   100.64.0.1   <none>        443/TCP   86m
NOTE
After a successful login, kubectl uses a token for authentication so that you don’t have to provide user and password for every new kubectl command. How long the token is valid can be configured. If you want to log in again earlier, reset plugin oidc-login:
- Delete directory
~/.kube/cache/oidc-login. - Delete the browser cache.
To see if your user uses the cluster role
view, do some checks withkubectl auth can-i.The response for the following commands should be
no:shkubectl auth can-i create clusterrolebindingsshkubectl auth can-i get secretsshkubectl auth can-i describe secretsThe response for the following commands should be
yes:shkubectl auth can-i list podsshkubectl auth can-i get pods
If the last step is successful, you’ve configured your cluster to authenticate against an identity provider using OIDC.